Proofreading – how to mark your corrections
You sent your book manuscript to the typesetter, waited patiently, and finally you got your book in a PDF file, ready for the first round of correction. If you ever wondered how to mark all your comments and indicate problems in a text, here are some tips how to prepare your proofreading remarks to make the whole process easier for both you and your typesetter.
Print, mark, scan
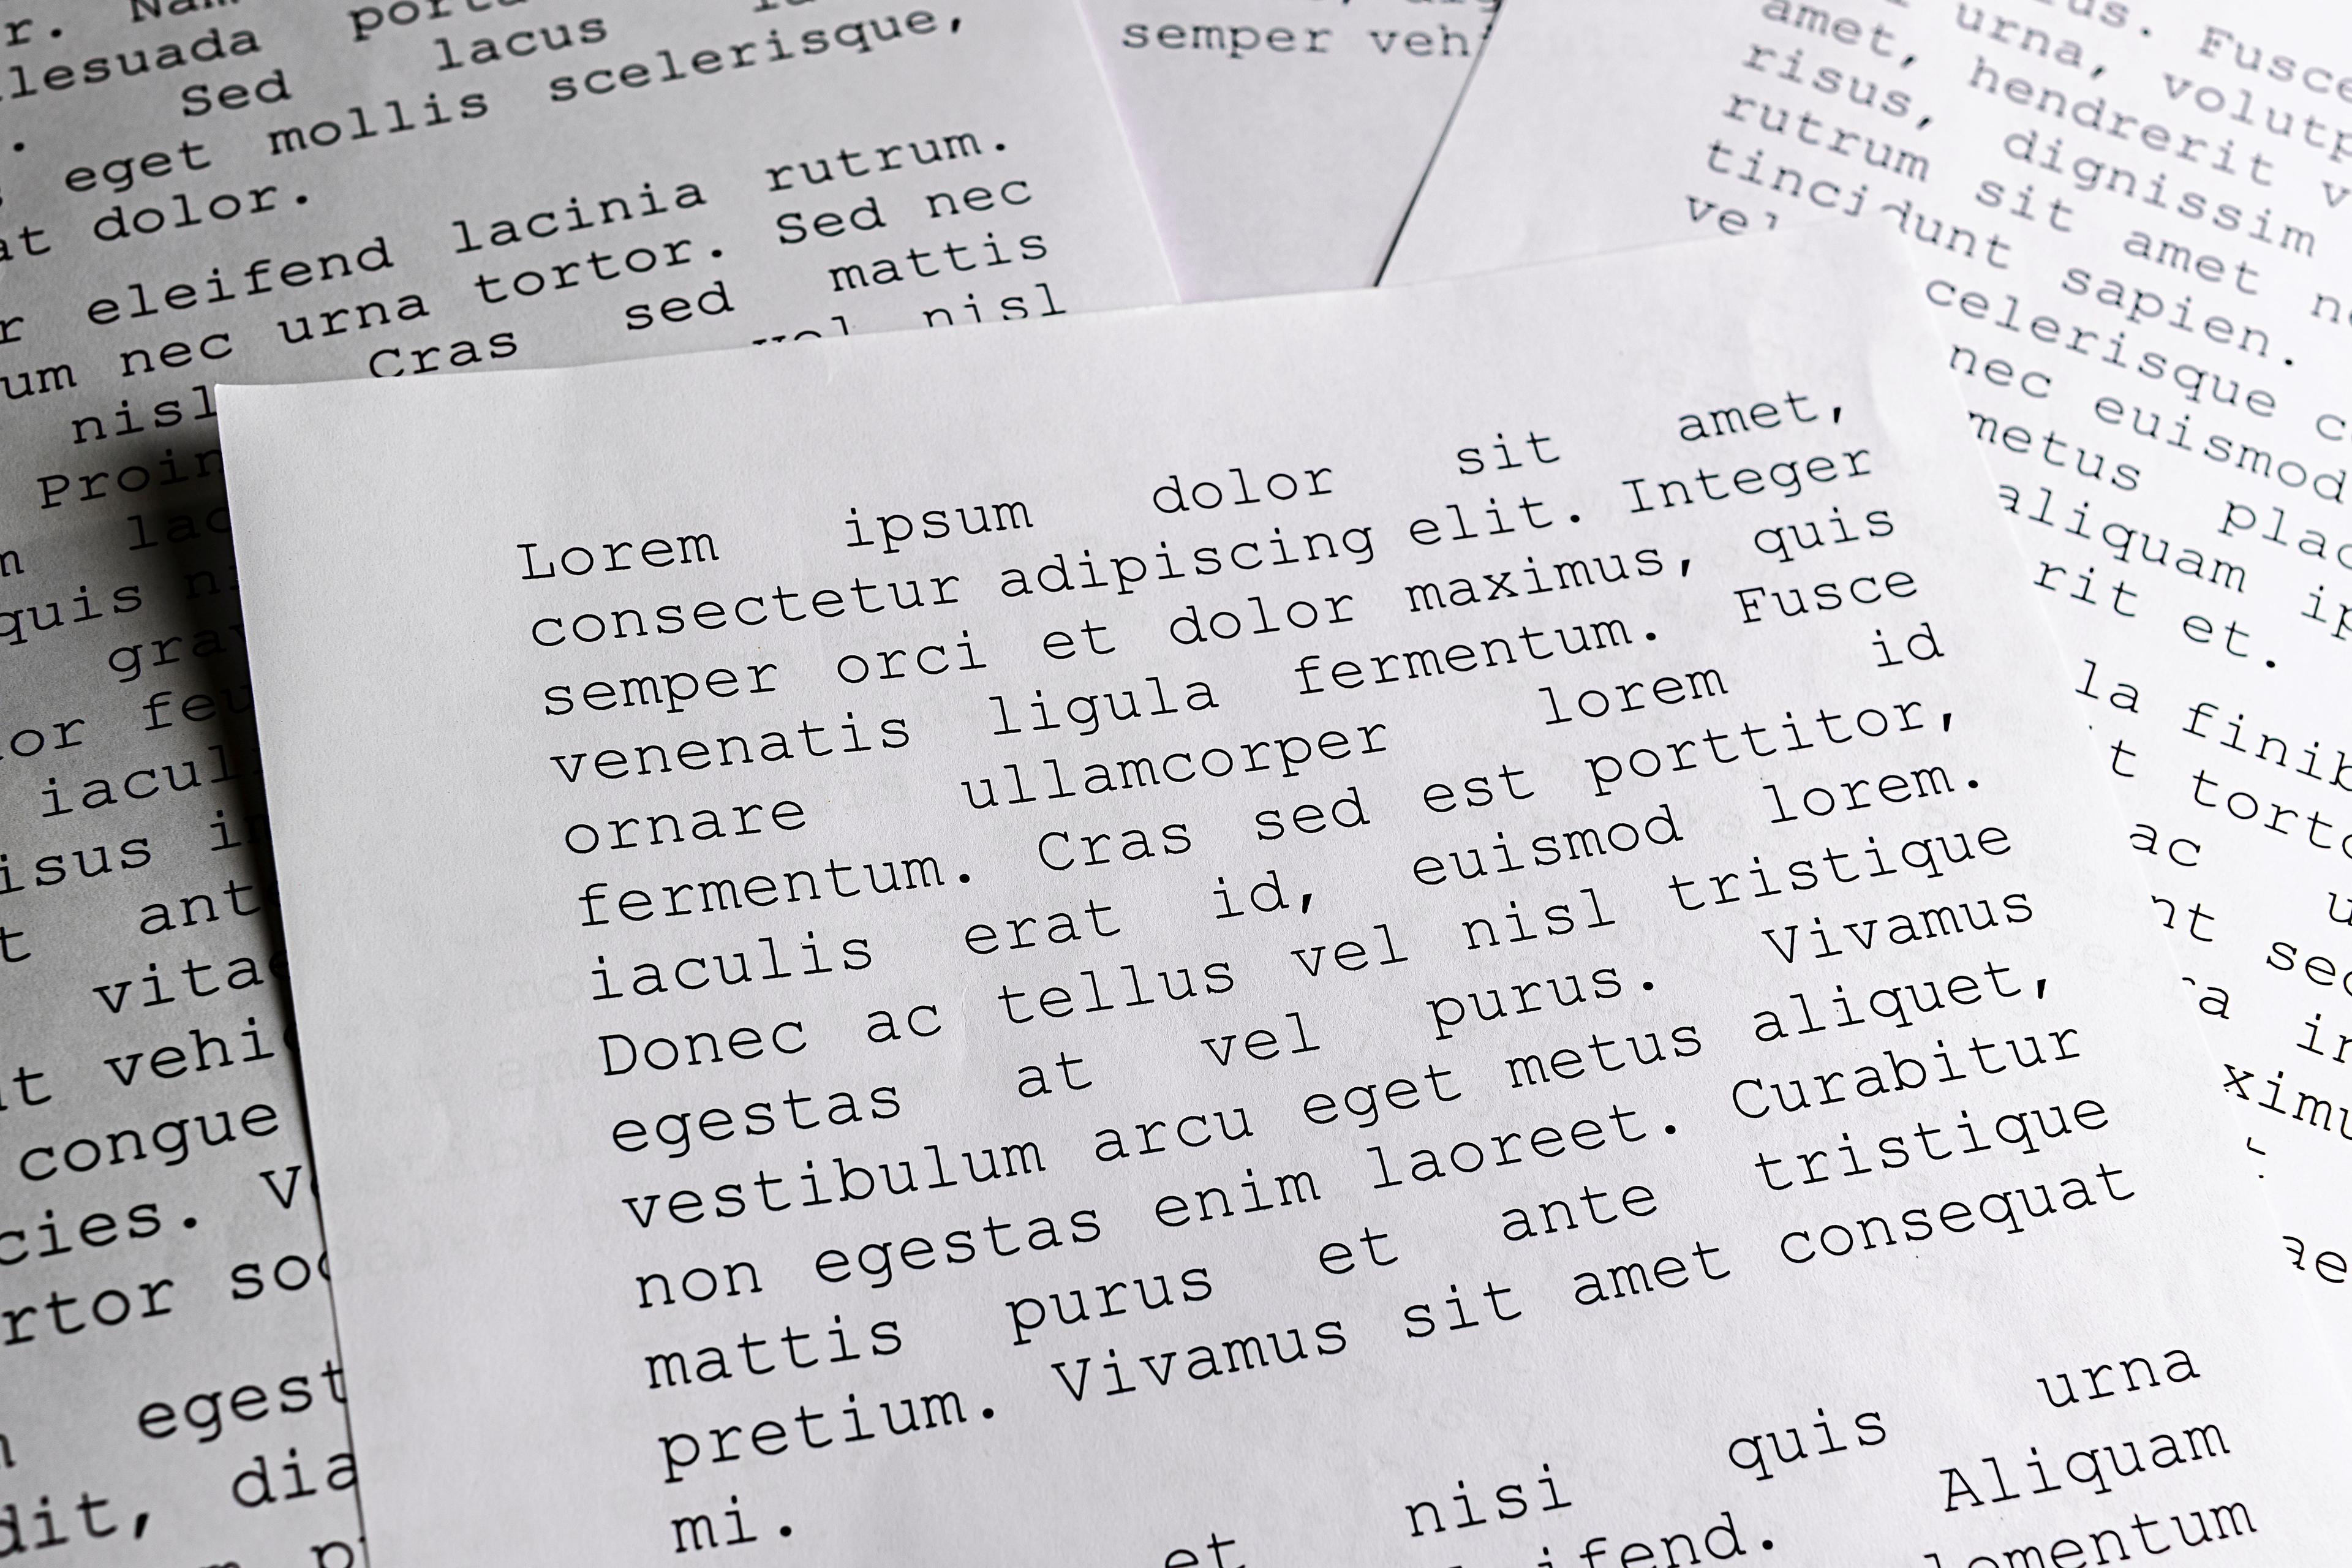
If you prefer to read longer text on paper, you can prepare your copyedited manuscript in an old-school way, printing out your copy and mark all corrections by hand. This conventional approach has been a standard in the industry for numerous years.
Copyeditors in publishing houses use standard proofreader’s marks to indicate all necessary corrections. Common symbols, abbreviations and examples of such copyedited manuscripts can be readily accessed through Google Search.
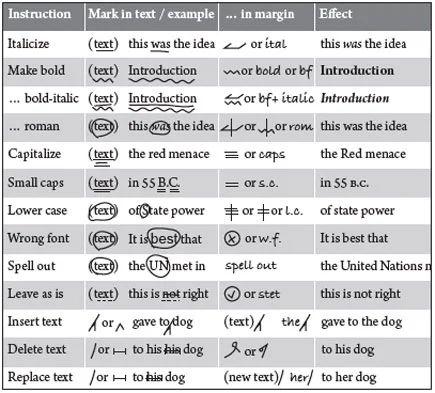
Source: https://gettingpublished.wordpress.com/2010/03/04/common-proofing-marks/
You don’t have to use standard marks if you haven’t used it before. However, there are few rules to keep in mind, when making marks on printed copies:
1. Clarity of comments: Ensure that your comments are marked and/or written in a way that is understandable for person who will perform the corrections in your text.
2. Marginal marking: Consistently place a mark on a margin next to a corrected line, so there won’t be any overlooked changes in your document.
3. Text Replacement or Addition: If you want to add or replace a bigger section of the text, it is always easier to send a new text written in a Word document or directly in an email than to handwrite it in the page margin.
You can either scan pages with handwritten remarks or send the original paper copy directly to the publishing house / typesetter engaged in the production of your book. If the printed file has many pages, you can send only the ones with the corrections.
With new technologies, comes also possibility to make handwritten corrections already in a digital format, using such tools as a tablet equipped with a dedicated digital pencil. If you choose this option, remember that all of the rules mentioned above apply here as well.
Using markup tools in Adobe Acrobat
If you don’t feel like printing a hundred-page book, a free version of Acrobat – Adobe Acrobat Reader – gives you an alternative to add comments directly in the PDF file. While the professional version of the software offers an array of tools for proofreading, the most commonly utilized, and freely available, features include the addition of notes and text highlighting. There are many tutorials on how to do it, you can also find detailed information on Adobe Help page.
You can highlight a single word or entire sentence and write a comment describing what should be changed. This way of marking your corrections is probably the most effective one from a typesetter’s point of view. It is much easier to manage list of comments in PDF file than to look for handwritten corrections in the scanned copyedited manuscript.
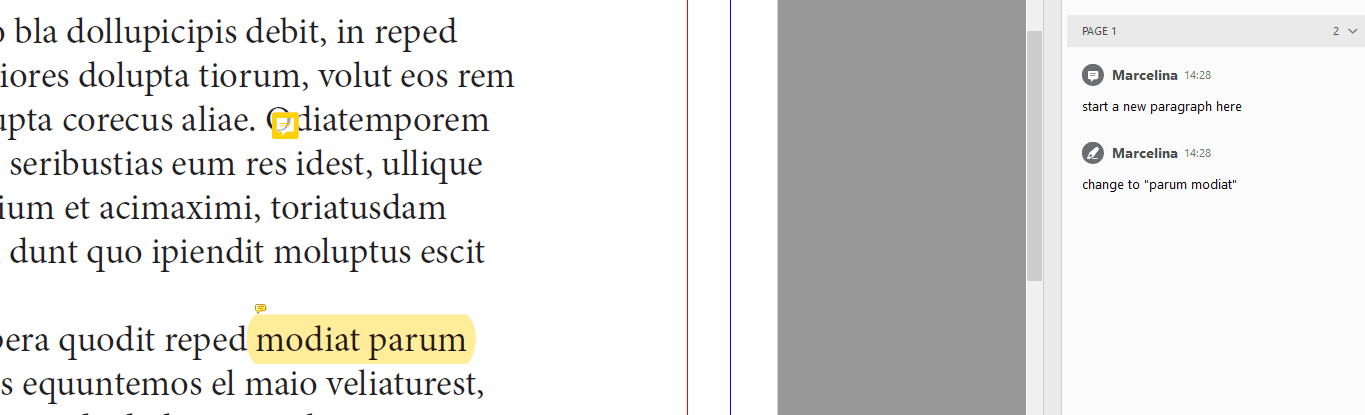
Text highligthing can be also used to mark your index entries (see our previous article How to prepare your text before typesetting (part 2).
It’s crucial to remember that the actual text cannot be edited within a PDF file. Don’t use ‘Edit PDF’ tool even if you have the access to it. All the corrections must be done in the original page layout design software that was used to create your book. Editing text directly in a PDF file can change the page layout and corrections can be untraceable for the typesetter.
List of corrections
If you read your PDF on a device or in other software that doesn’t have the option to write comments in it, you can always prepare a list of corrections. You can write it in an email, create a Word or Excel document, the choice is yours. What is the most important with this type of proofreading remarks is to indicate precisely where to find the word, sentence or even the entire paragraph you want to change.
The most common way of making such list is to give the coordinates, namely the page and line numbers, followed by a concise description of the necessary correction. For instance: page 24, line 10 – ‘delete the word “example”’. You can also give the context, few words before and after the correction, so there will be no misunderstanding.
Take your time while making a list. Check thoroughly if you give the correct page and line number. Be precise while writing your comments, so that the typesetter would have no doubt what your intentions were.
Automatic corrections
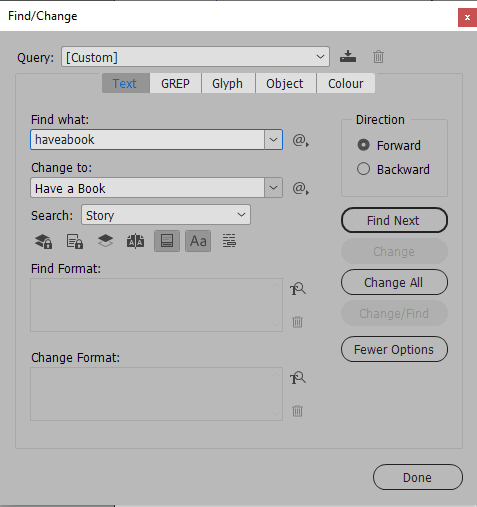
If you notice that there is the mistake repeated several times in the book, you don’t have to mark every single occurrence. For example, you want to change a name of your character or you find out that you misspelled a name of the company in the entire document. You can always ask your typesetter to use ‘Find/Change’ tool.
Few rounds of correction
Once the typesetter is done correcting your book, you will get another PDF document to check if all your corrections are made. You may also want to read the whole text one more time and find some additional things to improve.
Amount of proofreading rounds often depends on your agreement with the publishing house. For self-publishers, correction fees may be predetermined or charged on an hourly basis. We already gave some tips on how to prepare your manuscript in Word to avoid many additional corrections, check our article PART 1 and PART 2.
Even with the unlimited proofreading rounds, it is essential to recognize a point at which corrections must cease. It can be difficult because you want your book to be perfect and you may feel the need to improve it endlessly. But it is always better to have your book published with some minor mistakes, than to stuck with the unfinished manuscript.